September 8th, 2015
How to Map Out Your Membership Area For Your Online Course
Planning an online course, not sure exactly what to include?
No worries, I’ve got you covered today.
Sometimes I take for granted all the random things I know, have taught myself in order to run and operate my business…everything from the basic software, plugin configuration to the pages I might need for a webinar to my email marketing software, and setting up funnels.
How much time have you spent trying to figure out these tech pieces?
If the answer is a lot … stay tuned…each month, I’ll tackle a different piece of the launch technology puzzle…give you the very basics on a process you will need to know how to set up (whether you’ve got a team or not).
Having a basic knowledge of all the processes running in your business– so you can delegate more effectively, know how long “things” take, understand and troubleshoot when things go wrong.
So are you ready? Today I’ll show you how to map out your online course member’s area.
Here’s what we’re going to cover:
- What pages you need for a bare bones member’s area
- How to decide where your site lives
- Should you drip or not to drip your content
- Integration (don’t worry this will give you some tool suggestions)
Basic pages you’ll need for the member’s area:
The first thing I do is to start mapping out every member’s area. I often use Trello for this, but a notebook or empty google doc is totally fine. List out all the pages I’ll need for the site. Here are the ones I use and you’ve likely seen if you’ve purchased an online course:
- Home/Dashboard – video, first steps
- List of Modules
- Individual Module pages link back to this main modules page
- Bonuses Main
- Individual Bonuses
- Schedule/Calls
- Contact
- Resources
- Link to Community
If you’ll notice, I’m starting with your list of pages. I’m not starting with a specific theme.
Tip: When you’re making your own online course or product member’s area, you can use any theme you want really. I suggest putting your content on pages not posts, but really there are many different ways to do this. Also, install your theme of choice, add the maintenance mode plugin…and you don’t even need to have your member’s plugin set up until the very end.
Here’s a quick walk-through the sections in Fearless Launching just so you can see what I’m talking about:
Here’s what one of my retired programs the Launch Walkthrough looks like – it lived on a 1-page member’s area protected by Wishlist Member.
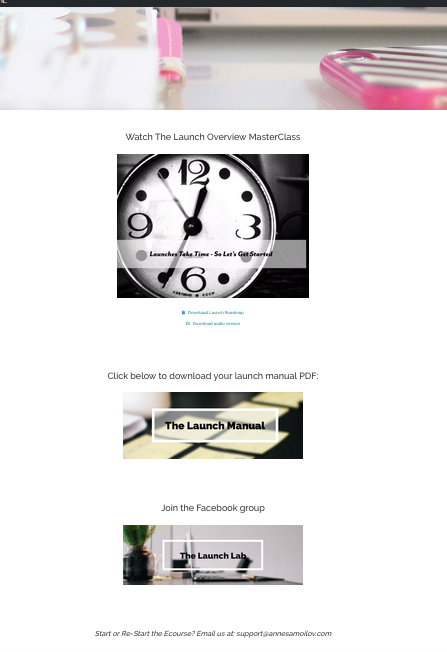
You may decide to organize your member’s area differently, but this is essentially how it’s been for me…
Where should your site live?
People handle this in so many different ways.
Here’s what I do: FearlessLaunching.com is where my sales page or waitlist page lives.
My member’s portal or member’s area is now on the Kajabi platform. It’s been hosted a few different ways over time, but
Keep it simple.
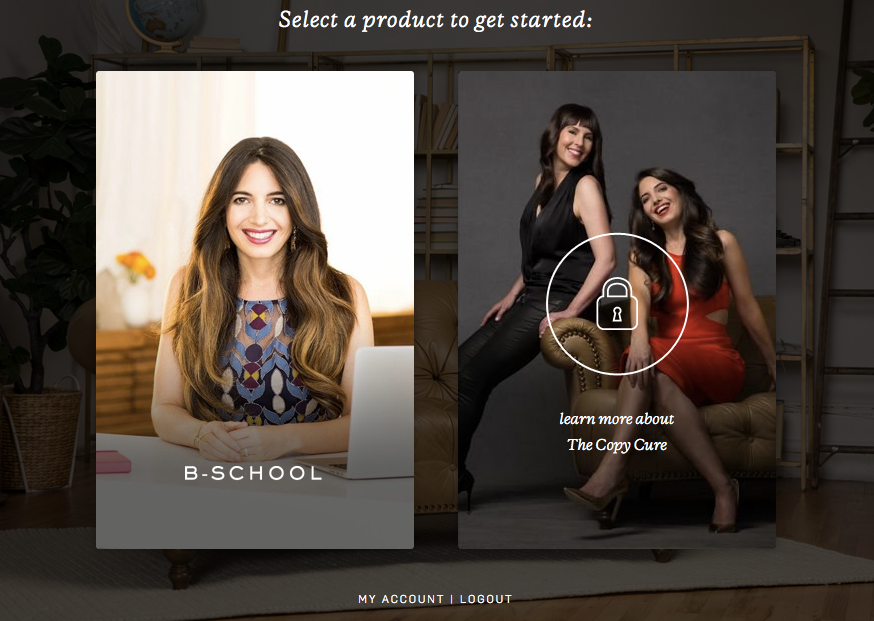
You could also have one big member’s portal where all of your products live and are accessed. When you log into Marie Forleo’s B-School, you’ll see this as your choice.
You can see the benefit of having them together…for those people who haven’t purchased yet, they get the message every single time they login that they are missing training you’ve got for them!
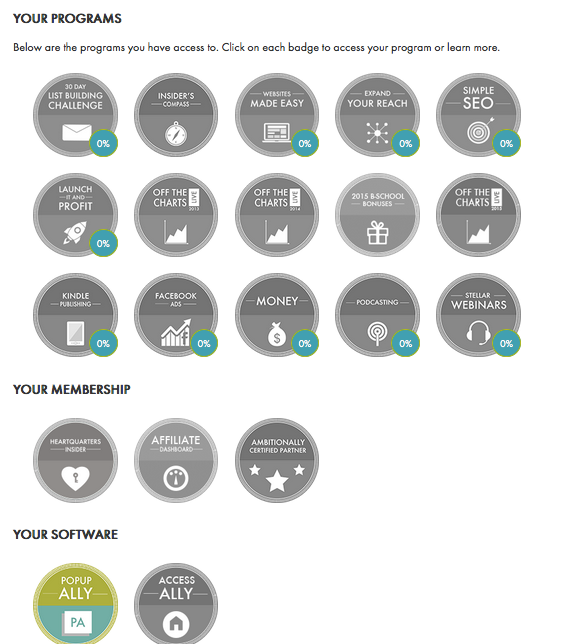
You might even mix the hub to include your freemium content too like Nathalie Lussier’s hub below. It clearly shows your customers and subscribers what training they have unlocked and which training they do not have unlocked!
To drip or not to drip your content
A lot of people are stuck on the topic of having all the content available immediately or dripping it out week by week.
Certainly, making everything available at once makes the most sense for you—because it’s easier to set up, but is it better for the learning experience of your student?
Here’s a quick guideline for you to follow:
If your course or material should be consumed in a specific order drip the content out.
If it doesn’t really matter how people consume your course, let them have it all as soon as they purchase.
During Fearless Launching, I suggest a path to follow, but because so many people come into the course in different phases of their launch, I make the core material available soon after joining the community.
Then, there’s an email series that gets sent out for the duration of about 6 weeks giving them reminders about the content, telling them what to do next.
So even though the customer has the material right away, they also get email prompts from me in the order I think they should consume the material. Also – by sending them the emails, I’m reminding them to actually go through the course (because how many times do you buy things and then forget about it??).
Why integration is your most important tool
Once you’ve got all your pages laid out…maybe even all your content loaded into each page, you’ll need to find a way to protect the content from people who haven’t paid for it.
This is where people usually go on the search for the right membership plugin.
There are free choices and paid ones available…here’s an article with a list of some of the best.
Now, the only thing you need to choose is something that integrates with your payment system, your email marketing system…and that has a fairly easy set up.
Again – lots of choices, but here are a few that didn’t take me long to get up to speed on, do a simple set up to protect my content and had plenty of how to videos.
Check out this post I wrote about choosing an online course builder.
Now it’s your turn
Are you trying to set up a member’s area for your course or digital program? Leave a comment below letting me know your biggest challenge, are you trying to set it up all by yourself? Do you have a team helping you?
And if you’ve already got something set up, tell me about your process, the tools you used, and how you’d do it differently the next time!